
Many Chicagoland homeowners hesitate to book a free estimate because they fear that window film is permanent. This worry about being stuck with a specific look or level of shade is quite common. The truth is that window film is designed to last for years, but it can be removed cleanly when the time comes. Professional installers use heat, scrapers, and safe solvents to pull the film away and remove all adhesive residue so your glass looks factory fresh.
Can window film be removed is a common question for Chicagoland homeowners who worry about making a permanent change to their home glass. The answer is yes – modern window film is engineered for long-term performance but can be removed cleanly using professional heat-assisted techniques that leave glass undamaged and ready for a fresh installation.
Schedule a free estimate today and get professional answers about window film removal for your Chicagoland home.
You might worry that taking the film off will scratch the glass or leave a mess, but you can get UV protection today without any long-term risk. Read more in The Complete Homeowner’s Guide to Residential Window Film in Chicagoland to see the many benefits. Our family-owned team has served the area since 1988 and we can show you that yes, window film can be removed safely.
Can Window Film Be Removed: Yes, Window Film Can Be Removed – Here Is How
Modern window film is built to last 10 to 20 years, but it is not permanent. Professional removal uses heat to soften the adhesive, allowing the film to peel away in large sheets without leaving sticky residue or damaging the glass beneath.
Many people worry that adding window film is a choice they cannot change. The reality is that modern window film can be removed whenever you need to update your home’s look or replace aged film that has served its purpose. Premium films stay in place for 10 to 20 years or more, using UV inhibitors and stable dyes to resist fading and discoloration over time.
The basic removal process
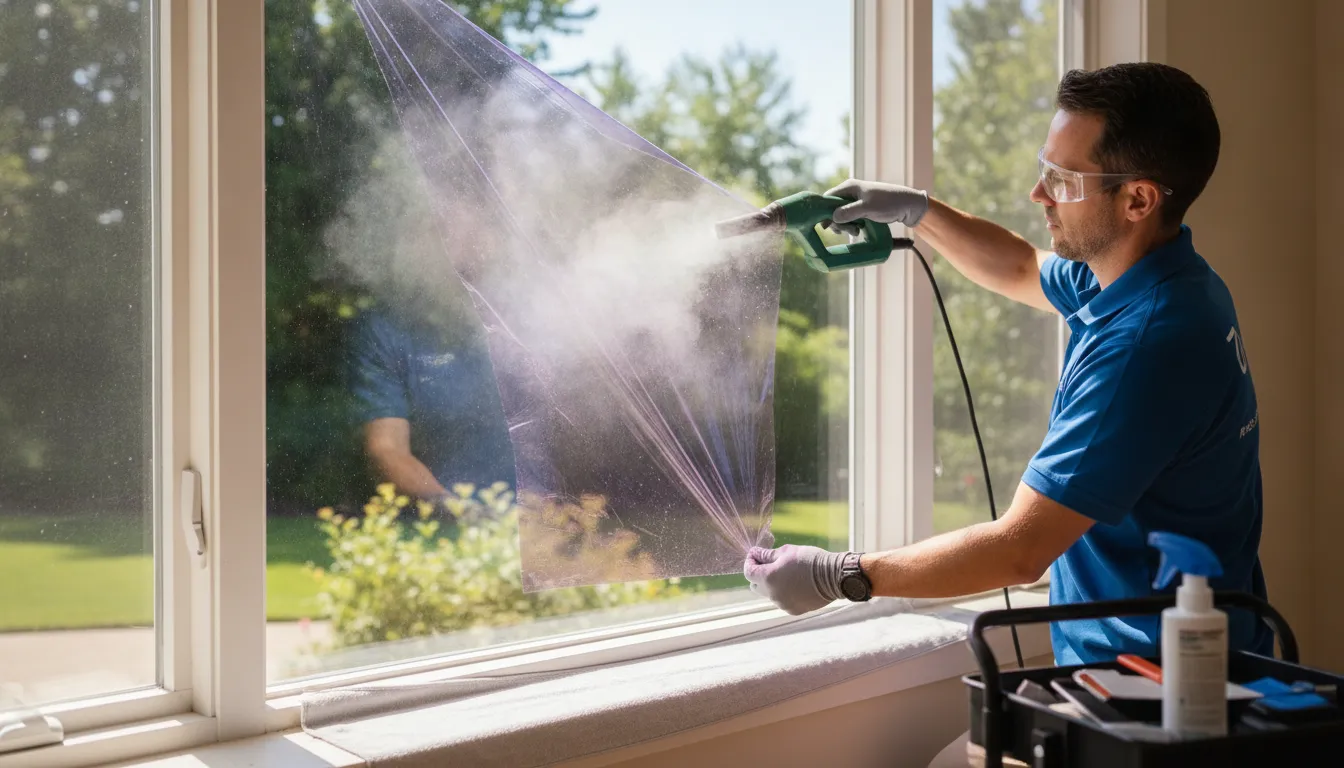
Removing window film takes time and the right approach. The job follows four main steps. First, heat is applied to soften the adhesive. Then the film is peeled away from the glass. After the film is removed, the remaining adhesive must be broken down with a solvent. Finally, the glass is cleaned to restore its original clarity.
You will need a few key items to do the job correctly. A heat gun or fabric steamer works best to warm the film. A sharp razor blade or scraper, adhesive solvent, and cleaning tools round out the kit. Using a steamer is often the safest and fastest choice for home windows.
How heat dissolves the adhesive
Heat is the critical element in effective removal. When the film is warmed, the adhesive layer beneath softens significantly. This allows the film to be pulled away in large, intact pieces. Attempting to peel cold film often causes it to tear into small fragments, making the job far more tedious and time-consuming.
For stubborn adhesive on old film, a soaking method helps. Spray the film with a mixture of water and ammonia, cover it with plastic sheeting, and let it sit overnight. This breaks down the aged adhesive so the film slides off cleanly the next day. This technique is especially useful for film that has baked in direct sunlight for many years.
Safety and final cleaning
Once the film is off, you will see adhesive residue on the glass. A glue solvent or vinegar solution removes it effectively. Keep your scraper at a flat angle to avoid marking the surface. Proper cleaning at this stage is essential for a clear view afterward.
Window film blocks 99% of harmful UV rays. The CDC warns that UV exposure damages skin and eyes over time. Removing old film means losing this protective layer, so replacement soon after removal is wise to keep your home cool and protected.
Will Removing Window Film Damage My Glass?
No, professional window film removal does not damage glass. High-quality glass is durable enough to handle the removal process without scratches or clouding when the correct techniques and tools are used by an experienced installer.
This is the most common concern homeowners raise, and the short answer is that removal does not damage glass when done correctly. Problems arise only when the wrong tools or improper techniques are used. With a professional, there is near-zero risk of glass damage during removal.
The danger of improper razor use
The most common cause of glass damage is using a razor blade at the wrong angle. If the blade is too steep, it can dig into the glass and leave permanent scratches. This is the top risk for DIY removal. You must also be careful with tempered glass, as excessive heat concentrated in one spot can cause stress fractures. A professional knows how to balance heat and tool angle to keep every pane safe.
Low-E coatings and aged adhesive
Modern windows often feature low-E coatings that improve energy efficiency. Using a blade on these coated surfaces can strip the coating away, an irreversible and costly mistake that may require full pane replacement. Before attempting removal, it is vital to know how window film provides 99% UV protection and how it interacts with your specific glass type.
Film that has been on a window for more than 10 years poses additional challenges. The adhesive breaks down over time, leaving a thick, stubborn residue on the glass. This old adhesive requires specialized solvents to dissolve safely without damaging the surface. Scraping without the correct solvent can ruin the appearance of your windows permanently.
When Should You Replace vs Remove Window Film?
Deciding between removal and replacement depends on the condition of your current film. Signs of failure include bubbling, peeling edges, color changes, and reduced heat rejection. When these appear, removal is necessary before new film can be installed.
Most high-quality window film lasts 10 to 20 years. But even the best film will eventually show signs of wear. Knowing these signs helps you decide whether to remove the old layer or install new film directly after removal. Modern film works on virtually any glass type, including single and double pane windows. Replacing aged film is an excellent way to restore performance and improve energy savings for Chicagoland homes.
Signs of film failure
The most common failure indicators are easy to spot. Film that turns purple or gray has experienced dye breakdown, losing its ability to block heat and light. Cracking or peeling at the edges signals the end of the film’s useful life. If your home feels noticeably warmer on sunny days, the film may no longer be performing effectively.
Why bubbles signal complete failure
Bubbles indicate that the adhesive is failing and cannot be repaired. These bubbles often enlarge over time and obstruct your view. According to Window Film Depot, bubbling is a sign of total adhesive failure that requires full replacement. If you see bubbles, remove the old film promptly before the condition worsens and leaves more adhesive residue on your glass.
How to make the right decision
Choosing between simple removal and a full replacement depends on your goals. Follow these steps to determine the best path:
- Inspect for visible damage. Look for bubbles, peeling edges, or color changes. If present, removal is needed.
- Test thermal performance. On a sunny day, feel whether the glass is hot to the touch. Excessive heat means the film’s UV and heat rejection has degraded.
- Define your objective. If you want a new look or enhanced privacy, removal is the first step. Then browse a decorative window film guide to find a style that fits your home.
- Schedule a professional assessment. Have an experienced installer examine the glass condition and adhesive residue before ordering new film.
Removing old film is the only way to start fresh. Whether you need to correct a worn appearance or restore your home’s comfort, a clean glass surface is the essential first step.
Professional Removal vs DIY: The Risks
DIY window film removal carries significant risks including scratched glass, stripped low-E coatings, and hours of labor per window. Professional removal uses industrial steamers and proper solvents to complete the job quickly without damage.
You can attempt to remove window film yourself, but the risks are substantial. Many homeowners assume they can simply peel the film off with a razor blade. This approach frequently leads to scratched glass or hours of frustrating work. Hiring a professional is almost always the better choice for your home and your peace of mind.
The cost of your time
Removing film is a slow, methodical process. DIY removal takes about 30 to 60 minutes per window. If your home has multiple windows or large expanses of film, you could spend an entire weekend on a single room. Professional installers use industrial steamers and commercial-grade solvents to complete the job in a fraction of the time. This makes replacing aged film far more practical when you hire experts who have installed the best residential window films for heat reduction.
Chicago’s climate adds another layer of difficulty. Extreme heat and high humidity affect how adhesive behaves during removal. According to Window Film Depot, professional installers adjust their methods for local weather conditions, preventing the delays and complications that plague DIY projects.
Protecting your glass and coatings
The biggest risk of DIY removal is permanent window damage. Scratches are common when amateurs use the wrong tool angle. For homes with low-E coated glass, the stakes are even higher. Accidentally stripping that coating is an irreversible mistake that requires full pane replacement.
Old film presents an additional challenge because aged adhesive breaks down into a stubborn residue. Professionals have access to industrial solvents that dissolve this adhesive safely without harming the glass or frames. If you are planning an upgrade, read The Complete Homeowner’s Guide to Residential Window Film to learn how to choose your next film once the old layer is removed.
Comparison of removal methods
The table below summarizes the key differences between DIY and professional window film removal.
| Factor | DIY Removal | Professional Removal |
|---|---|---|
| Time Spent | 30-60 minutes per window | Quick and efficient |
| Tools Needed | Must purchase or rent | Provided by the crew |
| Glass Risk | High risk of scratches and coating damage | Near-zero risk of damage |
| Cleanup | Messy adhesive residue | Full cleanup included |
| Success Rate | Often leads to frustration | Guaranteed clean finish |
While DIY may seem to save money upfront, the long-term value of professional work is clear. An experienced team handles large areas of film efficiently without the risks that come with amateur attempts. This is the best way to ensure your windows remain in excellent condition.
What to Do If Your Film Is Peeling or Bubbling
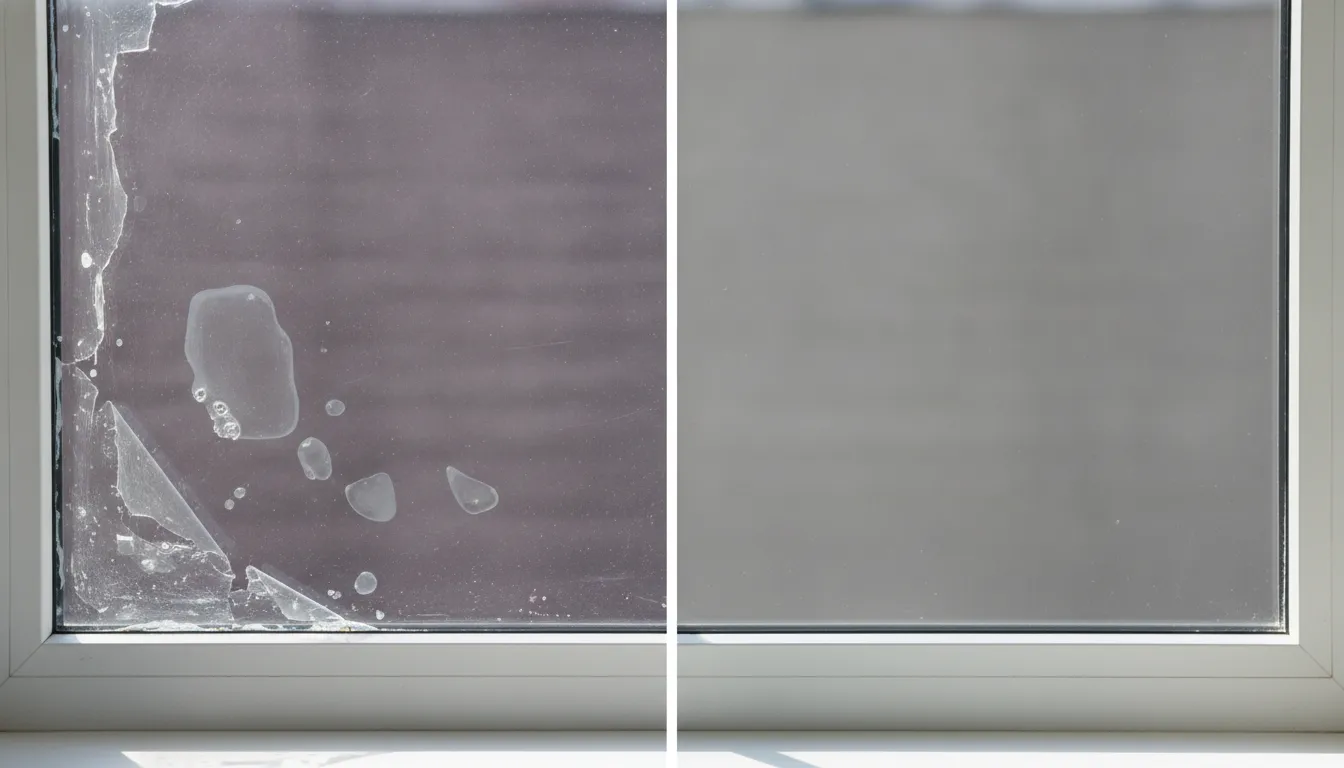
Peeling or bubbling window film signals adhesive failure that cannot be repaired. The affected film must be removed and replaced to restore UV protection, heat rejection, and visual clarity. Prompt action prevents further deterioration.
Finding bubbles or peeling edges on your window film can be frustrating. These signs indicate that the adhesive is failing. While small installation bubbles may clear up within a few weeks, large bubbles and peeling corners require action. Learn more about caring for your glass in The Complete Homeowner’s Guide to Residential Window Film.
Check for adhesive failure
Peeling at the edges is one of the earliest signs of adhesive breakdown. This often occurs due to age or substandard installation. When the film pulls away from the glass, dust and air penetrate the gap, accelerating the problem. According to Window Film Depot, most bubbling indicates complete adhesive failure that cannot be corrected with simple tools. In these cases, the film must be removed and replaced promptly to maintain your windows’ appearance.
UV protection is compromised
When window film begins to peel or bubble, it does more than look unappealing. It loses its ability to protect your home effectively. Bubbling indicates that the film layers are separating, reducing heat rejection and UV blockage. Once the film fails, your best residential window films for heat reduction no longer perform as designed. This can lead to higher cooling costs and increased fading of furniture and flooring. Monitoring your film’s condition helps maintain your home’s comfort and energy efficiency.
Use your warranty
If your film was professionally installed, you may have warranty coverage. Many top manufacturers cover issues like seal failure or film separation. At Sullivan’s Tinting, professional installation techniques are designed to prevent bubbles from forming. If you notice a problem, check your paperwork to see what is covered. A Mayo Clinic report notes that UV rays can harm skin even indoors, so keeping your window film in good condition is a smart health decision.
Frequently Asked Questions
Does removing window film leave a sticky residue on the glass?
Yes, removing old window film often leaves a layer of adhesive on the glass. The amount of residue depends on the film’s age and quality. While you can clean it with soap and water, this often requires hours of scrubbing. Professional installers use commercial solvents to remove all residue safely and restore a factory-finished look. Contact us for a free estimate for professional removal.
Can I remove residential window film with a hair dryer?
A hair dryer can warm the film, but a professional steamer produces far better results. Heat softens the adhesive, allowing the film to peel away in larger pieces. However, a hair dryer typically cannot deliver the consistent, even heat needed for clean removal. Concentrating too much heat in one spot can even stress the glass. The complete guide to residential window film explains why professional tools deliver superior results without risk.
How long does it take to remove window film from a home?
The timeline depends on the number and size of windows. For DIY removal, plan on 30 to 60 minutes per standard window, including peeling and adhesive cleanup. A professional team works significantly faster using industrial steamers and commercial solvents. For homes with multiple windows, professional removal saves a full day of work and eliminates the risk of glass scratches.
Does sunlight make window film harder to remove over time?
Yes, sunlight and heat can bake adhesive onto glass over many years. As film ages, it may become dry and brittle, peeling off in small pieces rather than clean sheets. This is especially common in the Chicagoland climate. According to Sullivan’s Window Tinting, premium films are formulated to last longer and remain easier to remove when replacement time comes.
Ready to schedule a free estimate?
Old window film can bubble, peel, or discolor as it ages, making removal more difficult the longer you wait. If sunlight bakes the adhesive onto your glass, you risk scratches or permanent damage that ruins your clear view. Addressing the issue now keeps your windows safe, your home cool, and your energy bills lower. Our experienced team can help you select the right film and complete the removal and installation with a factory-finished look that lasts.
Ready to schedule a free estimate? Call (847) 875-6969 to schedule a free estimate.